Navigation: Database > MS Jet Database Management >
Share the Database Folder


|
Navigation: Database > MS Jet Database Management > Share the Database Folder |
|
This topic applies only to systems using the default Microsoft Jet database. Skip this step when using the MS SQL Server database engine.Windows 7 users should use HomeGroup networking. Windows XP users should use Simple File Sharing to avoid sharing errors due to insufficient read/write permissions.
If the network includes more than one machine that must access the Amigo Pos database, the database folder must be shared to allow other workstations to access the database. Complete the following steps to share the database folder on the workstation so that the database can be accessed from other workstations on the network.
Select your operating system to view folder sharing instructions:
1. Log on to the workstation as the same user that installed Amigo Pos. The topic assumes that a Windows 7 HomeGroup network is used.
2. Locate the database folder by clicking the button with the window icon on the database configuration screen to open the database folder
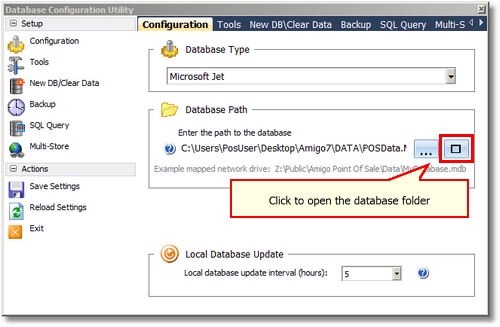
Database Configuration Screen
3. Navigate up one level so that you are able to select the database folder. For example, if the database is located in C:\Users\PosUser\AppData\Roaming\Amigo Point Of Sale\Data, change the path to C:\Users\PosUser\AppData\Roaming\Amigo Point Of Sale. Right-click the database folder, and then select the database folder and click Share with > Homegroup (Read/Write).
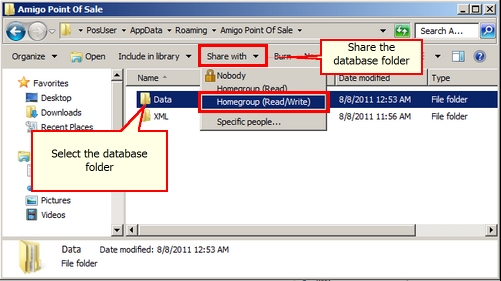
Share the Database Folder
4. To connect to the database folder from another workstation, follow the steps described in Map a Network Drive
1. Log on to the workstation as the same user that installed Amigo Pos. The topic assumes that Windows XP Simple File Sharing is used.
2. Locate the database folder by clicking the button with the window icon on the database configuration screen to open the database folder
Database Configuration Screen
3. Navigate up one level so that you are able to select the database folder. For example, if the database is located in C:\Users\PosUser\AppData\Roaming\Amigo Point Of Sale\Data, change the path to C:\Users\PosUser\AppData\Roaming\Amigo Point Of Sale. Right-click the database folder, and then click Sharing and Security.

4. If you see a message that reads, As a security measure, Windows has disabled remote access to this computer, click the Network Setup Wizard link. Then follow the instructions in How to set up the pos station for networking. On the File and printer sharing page of the Network Setup Wizard, be sure to select Turn on file and printer sharing. If you do not see this message, skip this step and go to step 5.
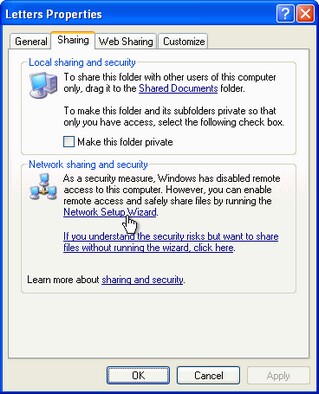
Important: If you do not see the Network Setup Wizard link or the Share this folder on the network check box, your computer probably has Simple File Sharing disabled. This is a common change made to computers used in a business domain. The following steps are valid only for pos stations with Simple File Sharing enabled.
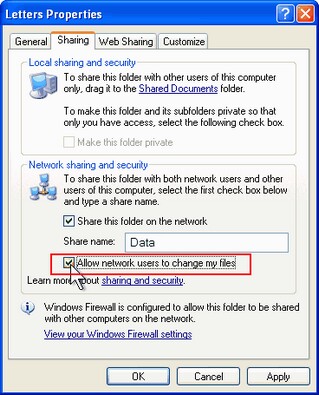
5. In the Properties dialog box, select the Share this folder on the network check box.
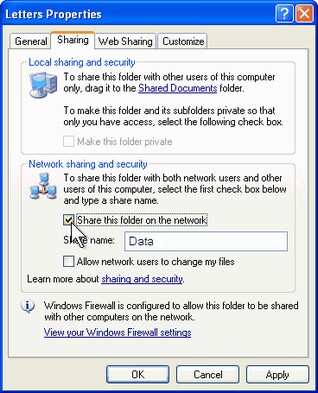
6. Select the Allow network users to change my files check box to allow remote pos stations to access and modify the database.
7. Click OK.
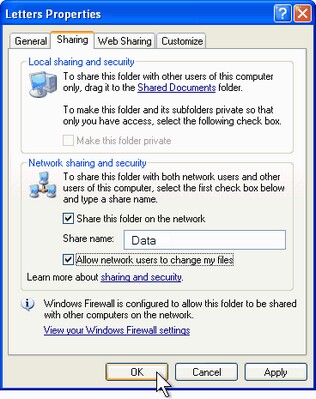
Windows Explorer will show a hand holding the folder icon, indicating that the folder is now shared. To connect to the database folder from another computer, follow the steps described in Map a Network Drive.
Page url: http://www.amigopos.com/help/html/index.html?share_database_folder.htm