Navigation: Database > MS Jet Database Management >
Map Network Drive


|
Navigation: Database > MS Jet Database Management > Map Network Drive |
|
This topic applies only to systems using the default Microsoft Jet database. Skip this step when using the MS SQL Server database engine.
When connecting to a database on a remote machine, create a network drive to the shared database folder for easy and reliable database path setup.
Select your operating system to view drive mapping instructions:
When you create a shortcut to a shared folder or computer on a network (also called mapping a network drive), you can get to it from Computer or Windows Explorer without having to look for it or type its network address each time.
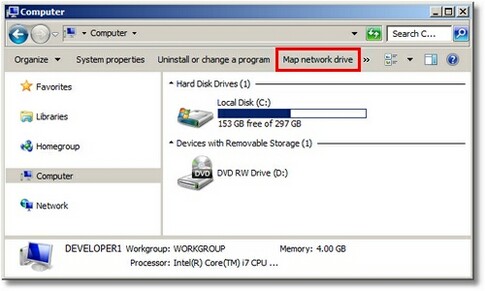
1. Open Windows Explorer or any folder and highlight Computer on the left. Click Map network drive.
Windows Explorer
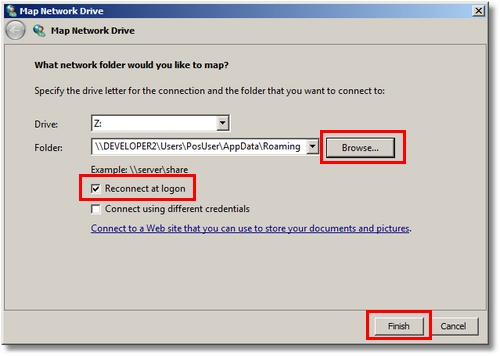
3. In the Drive list, use the default drive letter or select a new drive letter.
Map Network Drive
4. In the Folder box, click Browse to find the Shared Database Folder. Check the Reconnect at logon box to force the drive to connect every time the workstation is booted.
5. Click Finish. The workstation is now connected, or mapped, to the network drive. If you cannot connect to a network drive or folder, the computer might be turned off or you might not have the correct permissions.
6. Open the database configuration utility, browse to the mapped drive and select the database.
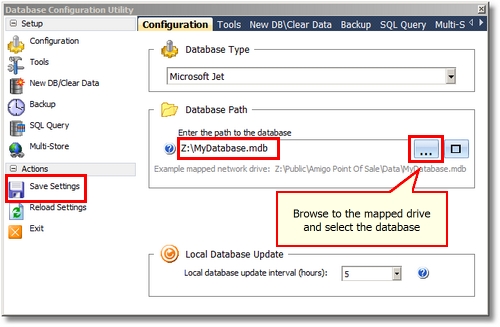
Database Configuration Utility
Map a Network Drive in Windows XP
1. Click Start, and then click My Documents.
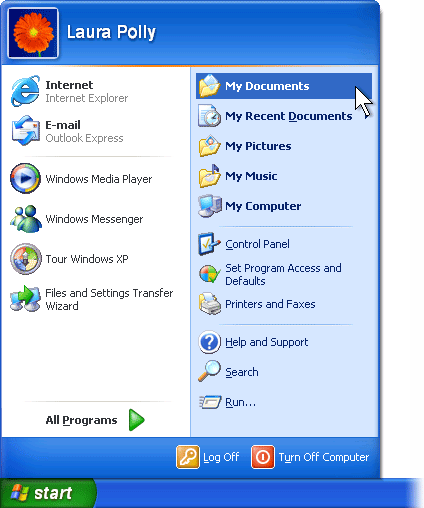
Start > My Documents
2. Click the Tools menu, and then click Map Network Drive.
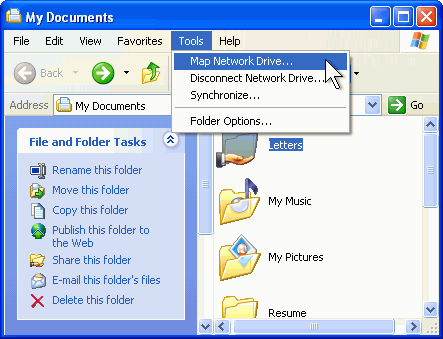
Windows Explorer
3. In the Map Network Drive dialog box, click Browse. In the Browse For Folder dialog box, click Browse to find the Shared Database Folder. and
Important: Check the Reconnect at logon box to force the drive to connect every time the pos station is rebooted.
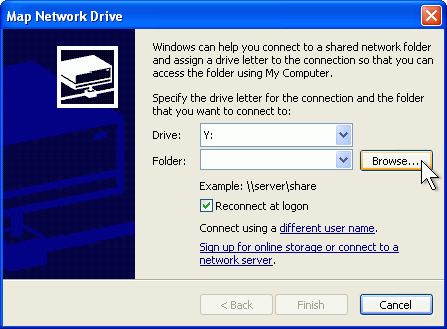
Browse to Shared Database Folder
4. In the Map Network Drive dialog box, make a note of the drive letter shown, and then click Finish.
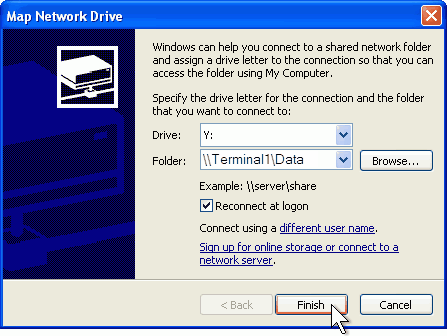
Map Network Drive
6. If prompted, type your user name and password, and then click OK.
7. Open the database configuration utility, browse to the mapped drive and select the database.
Database Configuration Utility
Page url: http://www.amigopos.com/help/html/index.html?map_network_drive.htm