Navigation: Sales Tax >
Quebec SRM


|
Navigation: Sales Tax > Quebec SRM |
|
Thank you for using this beta feature. Please submit any issues or concerns via support ticket at http://amigopos.com/Support/SupportTicket.aspx |
Amigo Pos offers the ability to use a Sales Recording Module (SRM) as required by Revenu Québec for mandatory billing in the restaurant sector. The SRM that Revenu Québec selected is an AAEON microcomputer, model AEC-6822, equipped with a security seal provided by IBM Canada.
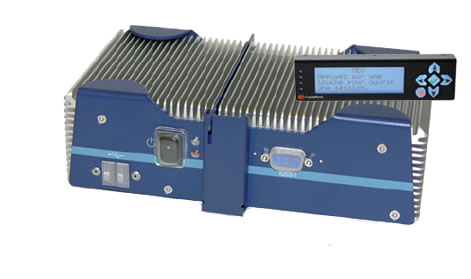
Sales Recording Module (SRM)
It is designed to:
| • | receive data related to commercial transactions |
| • | record transaction information (such as sales and taxes) in secure data storage |
| • | send to a receipt printer the information required to print the bill |
You must contact a sales recording module (SRM) installer registered as such with Revenu Québec to have your new or used SRM(s) installed and activated in your restaurant establishment(s). To have your SRM(s) activated, you need the identification number(s) and access code(s) Revenu Québec provided to you further to the registration of your restaurant establishment(s) for Revenu Québec files. If you have lost your number(s) or code(s), contact Revenu Québec.
If you have not received your identification number(s) and access code(s), you must register your restaurant establishment(s) in one of the following two ways:
| • | by using the Register a Restaurant Establishment online service, with which you can immediately obtain your identification number(s) and access code(s) |
| • | by completing form VD-350.52.A-V, Information Form for Restaurant Establishments in Québec, and sending it to one of the addresses given on the form (your identification number(s) and access code(s) will be sent to you in a letter confirming the registration of your restaurant establishment(s)) |
Amigo Pos should be configured for use with the MEV before completing the installation procedure described below.
1. Enable the SRM
Enable the SRM as shown in the installation section below and restart back office.
2. Configure Quebec Sales Tax
Sales tax values must be configured as shown in the Quebec Sales Tax topic in order for Amigo Pos to send properly formatted receipts to the MEV.
3. Configure Order Types
Each order type can be set to enable/disable Counter Mode (Comptoir). Counter mode should be enabled only for order types when an order is entered, recorded and paid for in a single step, i.e. fast food. This is when the order entry screen Submit button is not used; the order is immediately settled by pressing either the Cash, Credit or Settle button. Counter mode should be disabled for all other order types that require a customer receipt before payment is accepted, i.e. table service or delivery. Note that the SRM Counter Mode setting is visible only after the Quebec SRM Enabled value (shown in the installation section) is set to Yes and the program has been restarted.
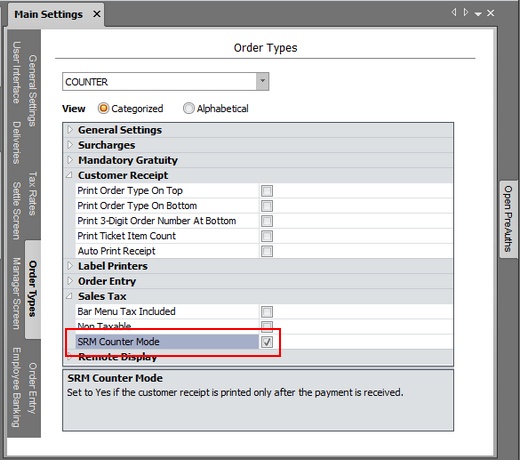
Order Type Counter Mode Setting
4. Configure Receipt Printing
Automatic customer receipt printing should be configured as per the Counter Mode setting. For order types where Counter Mode is enabled, set the receipt to print automatically after the payment is received. For table service or delivery, a customer receipt is generally printed before payment is accepted from either the order entry screen, manager screen or by using the Reprint Receipt button on the main screen. In most cases, the default setting of the print receipt button on the order entry screen should be set to the Off position. Automatic receipt printing can be enabled as shown at the Customer Receipt Printing topic. Referring to the Customer Receipt Printing topic, when using Counter Mode, set the value of Pay Now Receipt to Print Receipt After Settle (this value must be set at each pos station). Verify that the customer receipts are formatted correctly by referring to the following images.
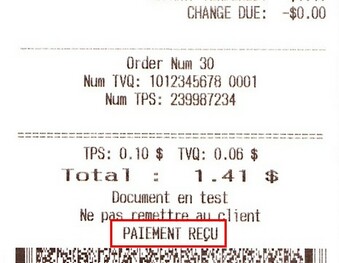
Customer Receipt Printed After Payment (Counter Mode)
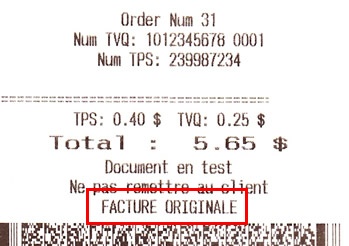
Bill Presented to Customer Before Payment is Received

Copy of Customer Receipt Reprinted from Main Screen, Manager Screen or Back Office
As of this writing Amigo Pos can only use the TCP/IP interface to communicate with the MEV. Future releases will support the serial port interface. The receipt printer must be compatible with both the MEV and Amigo Pos. The MEV must be configured with a static IP address on the same subnet as the pos system. Use the default port 8888. Each pos station should have a dedicated MEV. After the MEV is connected to the network and the receipt printer has been tested, open Back Office > Configuration > Peripherals and select Quebec SRM from the drop-down list. Enable the device, select the TCP/IP interface, enter the IP address, network port and restart Amigo Pos. The Windows firewall may prompt to allow communication between Amigo Pos and the MEV. If so, click Yes at the prompt to add a firewall exception for network port 8888.
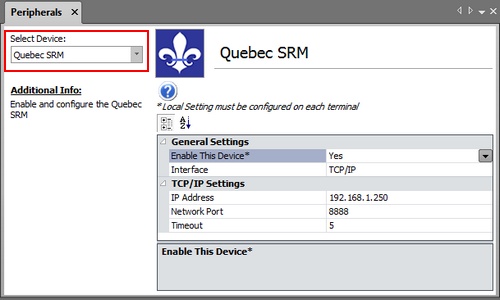
Back Office > Configuration > Peripherals
Amigo Pos must be able to print customer receipts in the event that the MEV becomes non-functional. In order to minimize downtime, the receipt printer can be connected to a 2-port RS232 switch box that allows the manual selection of the connected device (i.e. the pos station or the MEV). One such switch is the inexpensive Maituo MT-232-2. Connect the receipt printer to the far right I/O port, the MEV to port A and the pos station to port B. Switch A should be selected be default. In the event that the MEV fails, press switch B and disable the MEV in Back Office > Configuration > Peripherals as shown below. Note that a null modem adapter is used on port A but not on port B. A USB to serial adapter can be used on workstations that do not have a serial port. Be sure to install and test the receipt printer at the workstation as described in the receipt printer installation topic.

Serial Port Switch
Customer receipts are always printed through the MEV. Most custom settings such as line spacing, double underlines, custom text, etc are available. The image below, the text enclosed by the red rectangle is generated by Amigo Pos. Text outside of the rectange is generated by the MEV. Refer to the receipt format topic for additional information on customizing the customer receipt. Also note that the line feed cut command must be set correctly for the receipt printer as shown.
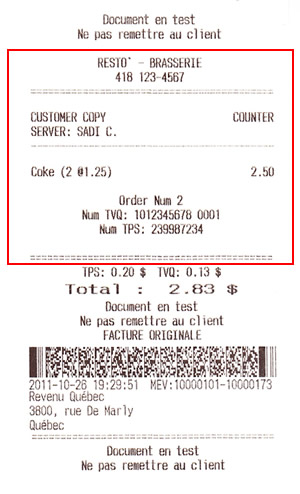
Customer Receipt
On systems with multiple pos stations, each MEV operates independently and stores data only for orders entered at the pos station to which it is attached. Amigo Pos does not send order information to the MEV until the customer receipt is printed, so that any order that has not been printed can be recalled or settled at any pos station regardless of the pos station used to start the order. After a customer receipt has been printed, the order can only be recalled or settled at the pos station that was used to print the customer receipt. In addition, the customer receipt can only be reprinted from the pos station where the receipt was originally printed. Similarly, orders can be voided only at the pos station where the order was settled. If a user attempts to recall, settle or void an order at a different pos station, an error message will appear.

MEV Error
An error screen will appear when Amigo Pos cannot communicate with the MEV before the timeout interval elapses. If this occurs, verify that the MEV is turned on and connected to the network router and try again.

MEV Communications Error
The window will also appear if the receipt printer is out of paper, has an error condition (i.e. the printer door is open) or is offline.
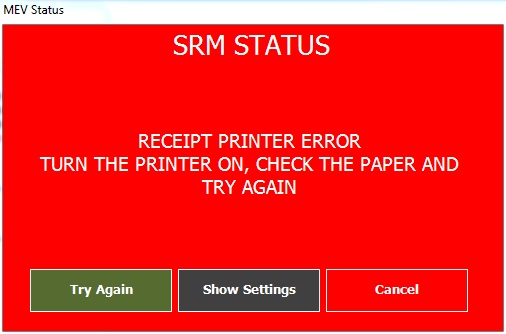
MEV Printer Error
Page url: http://www.amigopos.com/help/html/index.html?quebec_srm.htm