Navigation: Peripherals > Prep Printers >
Prep Ticket Format


|
Navigation: Peripherals > Prep Printers > Prep Ticket Format |
|
Overview
Several settings are available to customize the prep ticket. Note that not all printers are capable of every setting shown below and the prep tickets may appear different than the examples shown below. Do not enable unsupported commands, i.e. do not enable Print Menu Items Red if the printer is not capable of printing 2 colors or printing errors may result. Printing variations exist between printers from different manufacturers and the appearance of prep tickets may vary.
Review the following topics to customize prep tickets:
The following settings are available in Back Office > Configuration > Peripherals. All settings not preceded by an asterisk (*) are shared by all prep printers.

Prep Printer Settings
Print Settings
| • | Print Qty Start: Enter the character to use before the numeric quantity on the prep ticket |
| • | Print Qty End: Enter the character to use after the numeric quantity on the prep ticket |
| • | Print Line Feeds Bottom: Number of blank lines to print at the bottom of prep tickets |
| • | Print Line Feeds Top: Number of blank lines to print at the top of prep tickets |
| • | Delete Prep Ticket Alerts: Set to Yes to delete prep ticket alerts so that they are not printed again if the order is recalled and new items are added. |
| • | Print Date Time: Set to Yes to print the date and time at the bottom of the prep ticket (centered in smallest character size) |
| • | Print Remove Asterisks: Set to Yes to remove asterisks from menu item or modifier name on prep ticket |
| • | Print Header Double-Height: Print prep ticket header text in double-height font |
| • | Print Header Double-Width: Print prep ticket header text in double-wide font |
| • | Print Header Order Type: Set to Yes to print the order type on the prep ticket header |
| • | Print Header Printer Name: Set to Yes to print the printer name on the prep ticket header |
| • | Print Header Server Name: Set to Yes to print the server name on the prep ticket header |
| • | Print Header Table Name: Set to Yes to print the table name on the prep ticket header |
| • | Print Header Bar Tab Name: Print bar tab name on prep tickets for reorders on the same bar tab |
| • | Print Header Time: Set to Yes to print the current time on the prep ticket header |
| • | Print Customer Info: Print customer name, address and phone (centered in smallest character size) |
| • | Print Guest: Set to Yes to print guest number above menu items for order types that have guest assignment enabled |
| • | Print Menu Item Line Feed: Set to Yes to insert a blank line after each menu item and optional is printed |
| • | Print Footer Double-Height: Print prep ticket footer text in double-height font |
| • | Print Footer Double-Width: Print prep ticket footer text in double-wide font |
| • | Print Footer Order Type: Set to Yes to print the order type on the prep ticket footer |
| • | Print Footer Printer Name: Set to Yes to print the printer name on the prep ticket footer |
| • | Print Footer Server Name: Set to Yes to print the server name on the prep ticket footer |
| • | Print Footer Table Name: Set to Yes to print the table name on the prep ticket footer |
| • | Print Footer Time: Set to Yes to print the current time on the prep ticket footer |
Menu Items
| • | Print Menu Items Double-Height: Print prep ticket menu items in double-height font |
| • | Print Menu Items Red: Print prep ticket menu items in red |
| • | Print Menu Items Double-Width: Print prep ticket menu items in double-wide font |
Modifiers
| • | Print Modifier Level Asterisk: Set to Yes to print an asterisk before and after the optional level description when sent to prep printer |
| • | Print Modifiers Double-Height: Print prep order modifiers in double-height font |
| • | Print Modifiers Red: Print prep order modifiers in red |
| • | Print Modifiers Double-Width: Print prep order modifiers in double-wide font |
The following settings are set for specific order types in Back Office > Configuration > Main Settings > Order Types.
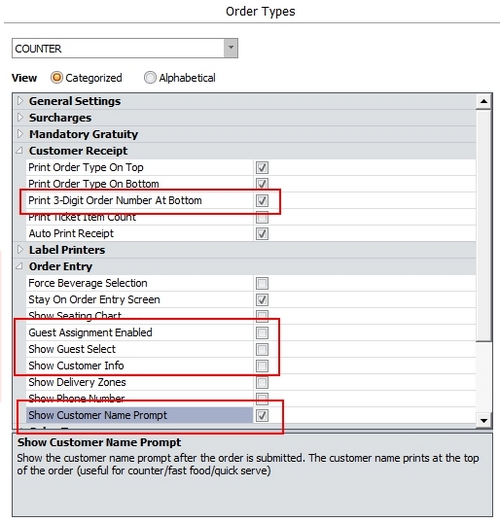
| • | Print 3-Digit Order Number At Bottom: Set to Yes to print a large 3-digit order number at the bottom of the prep ticket and customer receipt. For example, Order Number 12345 will appear as ORDER 345. This setting applies to both the customer receipt and prep ticket. |
| • | Guest Assignment Enabled: For Dine-In orders only, this setting must be enabled for the Print Guest setting shown above to take effect |
| • | Show Guest Select: For Dine-In orders only, this setting must be enabled for the Print Guest setting shown above to take effect |
| • | Show Customer Info: For Delivery or Pick-Up orders only, this setting must be enabled for the Print Customer Info setting shown above to take effect |
| • | Show Customer Name Prompt: For Counter or Take-Out orders only, this setting must be enabled for the customer name to appear on the prep ticket as shown in the example below |
Examples
The following example shows a Dine-In order for 2 guests with a prep ticket alert "RUSH" defined on the order info screen.
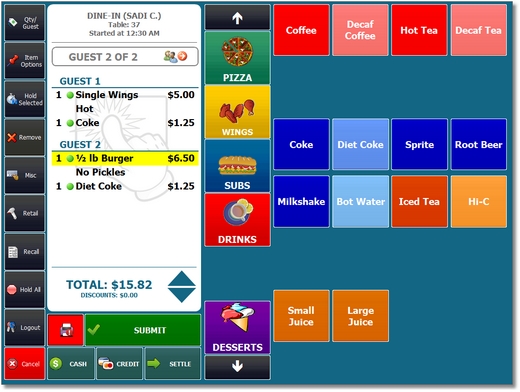
Dine-In Order With Guest Assignment Enabled
The prep ticket displays each customer's order separately with the prep ticket alert in red after the prep ticket header. Prep ticket header uses double-height/regular width characters, menu items use double-height/double width, modifiers use regular height/double-width and time is printed at the bottom.
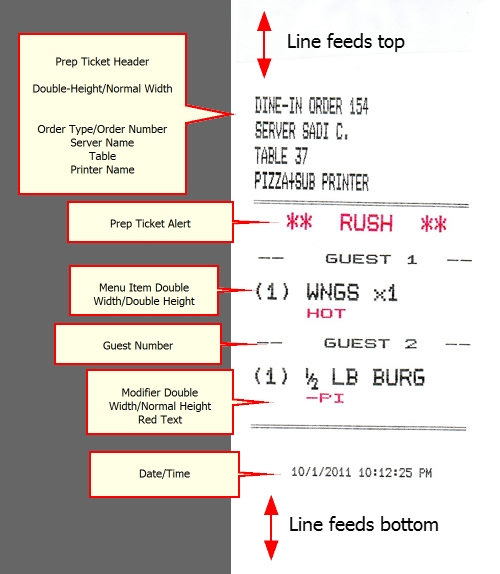
Dine-In Prep Ticket Printed by Pos-X Xr210
The customer name prompt appears for order types with Show Customer Name Prompt enabled. The name will print at the bottom of the prep ticket.
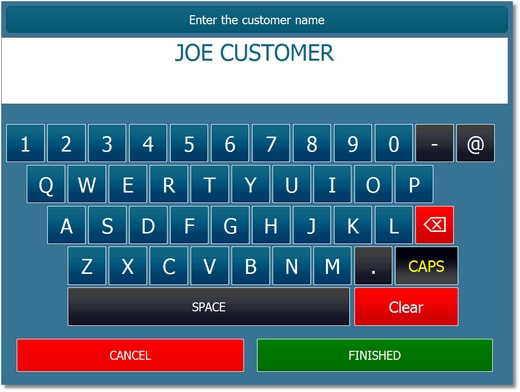
Counter Order Customer Name Prompt
The example counter order prep ticket shown below displays both the customer name and the 3-digit order number at the bottom. Prep ticket header uses double-height/regular width characters, menu items use double-height/double width, modifiers use regular height/double-width and time is printed at the bottom.
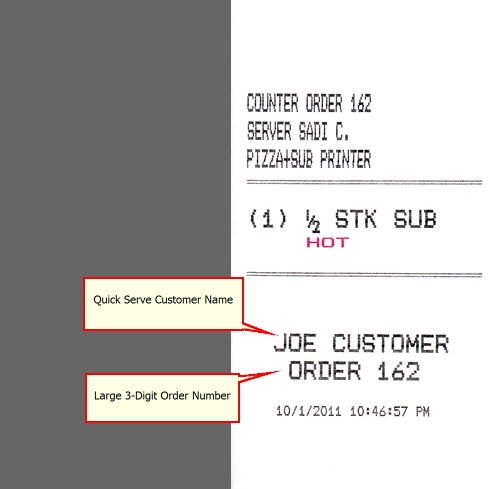
Counter Order Printed Using Pos-X Xr210
The delivery prep ticket shows customer information at the bottom. Prep ticket header uses double-height/regular width characters, menu items use double-height/double width, modifiers use regular height/double-width and time is printed at the bottom.
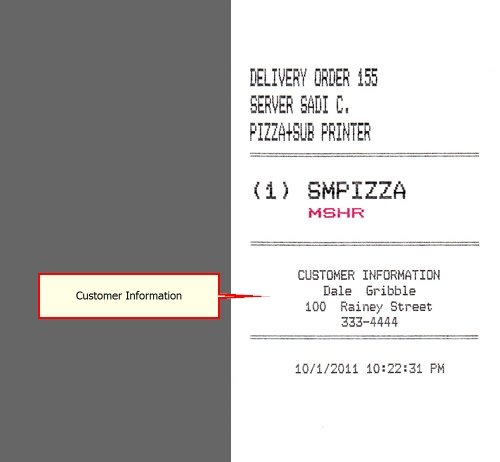
Delivery Order Printed Using Pos-X Xr210
After installing and configuring the prep printer, click the Test Print button to confirm that the settings are correct. Changes can be made and immediately tested without restarting Amigo Pos. Note that the Print button is disabled if the prep printer is not enabled.
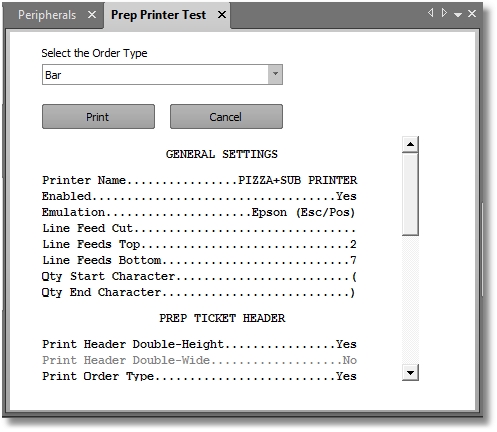
Prep Printer Test
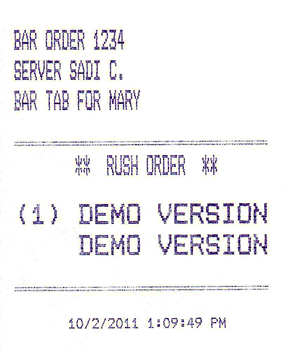
The following images show the same test prep ticket routed to 4 different printers with identical settings. Both Star printers are set to use Star Line Mode and both Pos-X printers are using the factory default Epson ESC/POS emulation. Note that red printing must be disabled for the Star SP500 or an error condition will result.
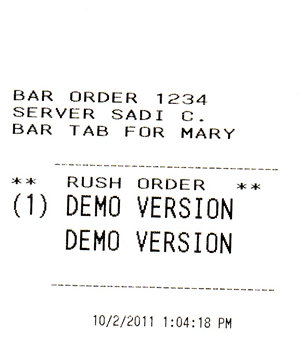
Star TSP100 (Thermal Paper)

Star SP500 (Purple Ribbon)
Pos-X Xr200 (Purple Ribbon)
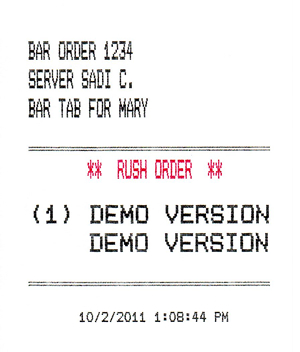
Pos-X Xr210 (Red+Black Ribbon)
Page url: http://www.amigopos.com/help/html/index.html?prep_ticket_format.htm