Navigation: Peripherals > Prep Printers >
Print Servers


|
Navigation: Peripherals > Prep Printers > Print Servers |
|
Print servers are used to simplify the installation and sharing of prep printers on the network. Print servers are available as an option on many popular impact and thermal printers. Printers with a parallel port require an external print server. The print server is connected directly to the network router and can communicate with an pos station on the network.
The following procedure describes the common scenario of an Epson TM-U220 impact printer attached to an inexpensive Netgear PS101 mini print server that is wired to a Netgear router with Windows 7 installed at the pos station. The steps are virtually identical for any wired or wireless print serveror router using either Windows 7 or Windows XP. The following process must be repeated at each pos station for each prep printer.

Netgear PS101 Print Server
First determine the print server's IP address. In order to find the print server's IP address, open a web browser at any pos station or back office pc and enter the router's IP address. If the router's IP address is not known, click Start > Run, enter cmd (or enter cmd in the Search programs and files box) and click OK.
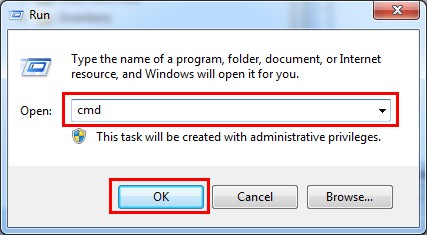
Open a Command Prompt
At the prompt, enter ipconfig and press Enter to display the current network configuration. The router's IP address is the default gateway.
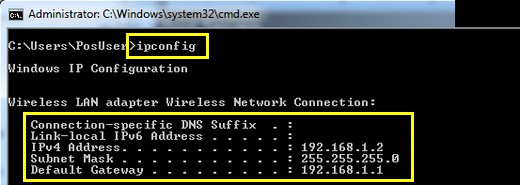
Run IPConfig
Open a web browser and enter the default gateway in the address bar to connect to the router. Click the Attached Devices link to view the IP address for each pc and other device connected to the router.This link may have other names for different routers; i.e. on Belkin routers it may be referred to as the DHCP client list. The Netgear PS101 default device name is easy to locate on the list. If the device name is not known, match the MAC address at the bottom of the printer server (or the box/documentation that accompanied the printer server) with the MAC address shown on the list of attached devices.
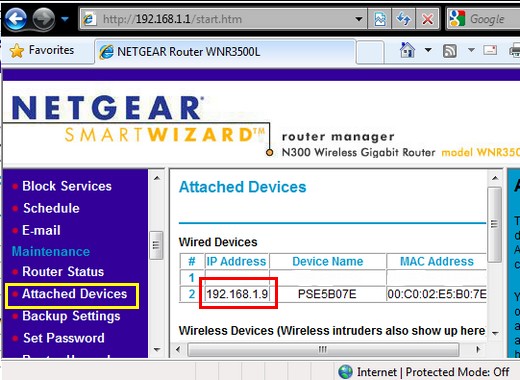
Netgear Router Browser Interface
Enter the print server's IP address in the browser's address bar to connect to the print server. Set the print server to use a static IP address so that the IP address does not change if the router is powered off or reset. In the example shown below, DHCP is disabled and the IP address is manually entered with the router IP address and the subnet mask. Click Save followed by Reset and wait approximately 60 seconds for the print server to reboot.
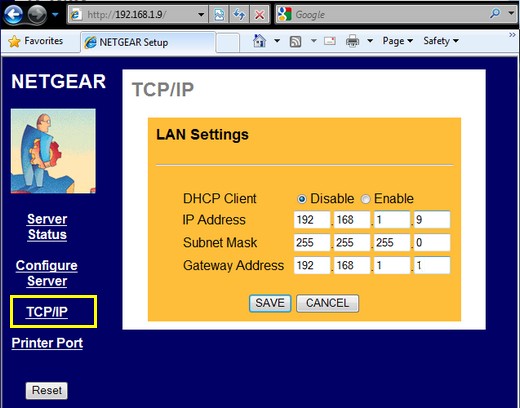
Print Server Configuration
Now Windows is able to communicate with the print server at any pos station or office pc on the network. Install the printer at each pos station by opening the Windows Devices and Printers folder (Printers and Faxes on Windows XP) and clicking Add Printer at the top.
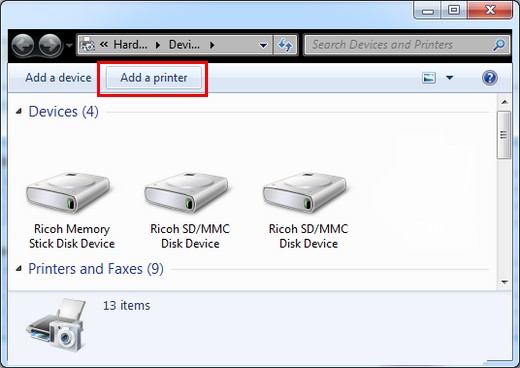
Devices and Printers Folder
Select Add a local printer on the first screen. Although the print server is a network device, a local port will be created at each pos station.
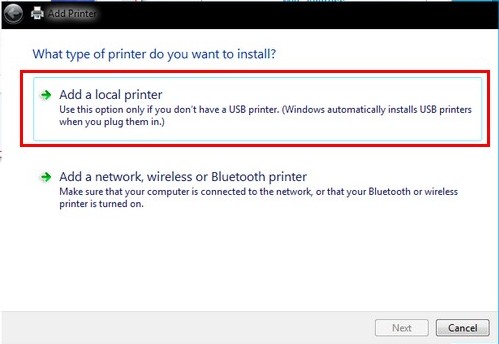
Select Local Printer
Click the Create a new port option and select Standard TCP/IP Port from the drop-down list. Click Next.
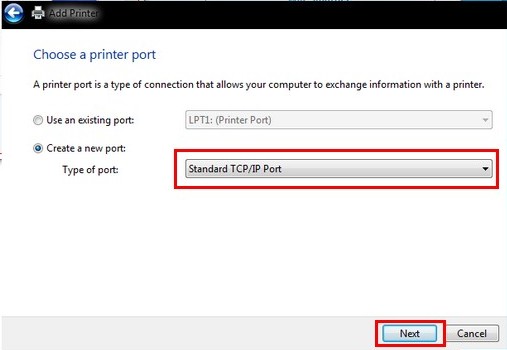
Create a new TCP/IP port
Enter the print server's static IP address and un-check the box next to Query the printer and automatically select the driver to use. The default port name can be used. Click Next.

Set the IP Address
Windows will not recognize the print server and the standard device type is set to Generic Network Card. Click Next.
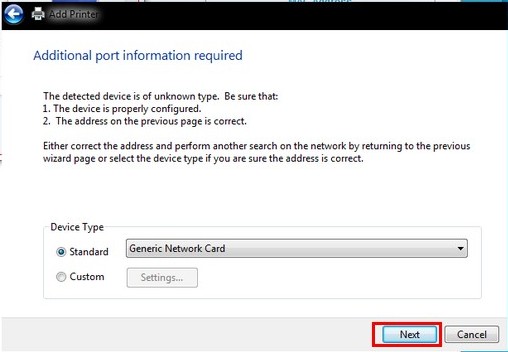
Use the generic network card device type
Amigo Pos will communicate with the printer using the printer's native command set so that a manufacturer driver is not required. Select the Generic/Text Only driver and click Next.
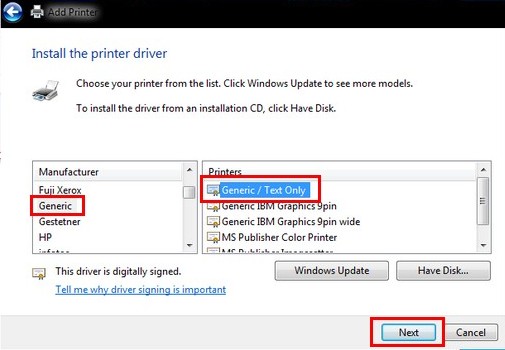
Select the Driver
Enter a friendly name for the printer and click Next.
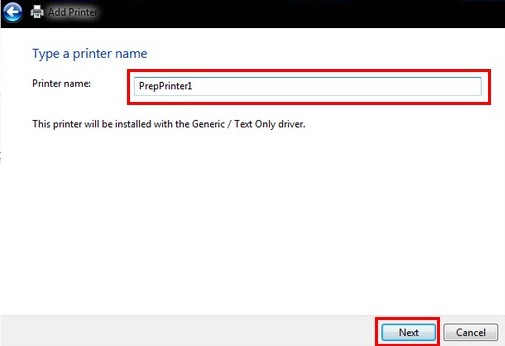
Name the Printer
Since the printer will be installed at each pos station, disable printer sharing so that the other pos stations do not attempt to connect to the shared printer. Click Next.
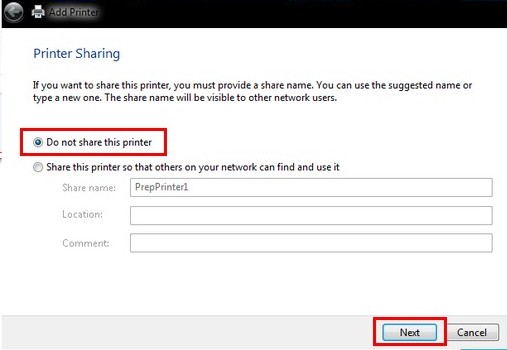
Disable Printer Sharing
Do not set the printer as the default printer. Click Next to close the Add Printer wizard.
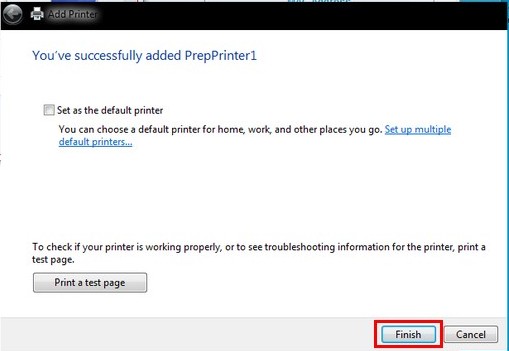
Printer Added Successfully
Open Back Office > Configuration > Peripherals and select Prep Printer 1 from the drop-down list. Enable the device and select the new printer name from the drop-down list. The Line Feed/Cut Command is not required for most common printers. Click the Test Print button to confirm that the prep printer is configured correctly. Note that the prep printer settings are stored in the local system registry and must be set at each pos station independently. Repeat the process for each additional prep printer before moving on to the next pos station.
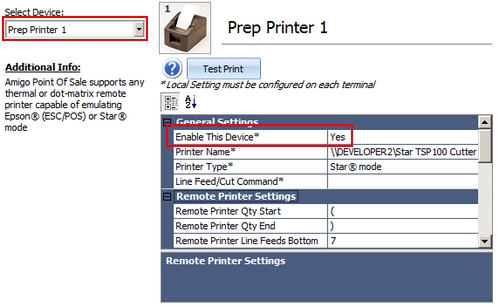
Prep Printer Settings
Page url: http://www.amigopos.com/help/html/index.html?print_servers.htm