Navigation: Database > MS SQL Server > Manual Installation >
Demo Database


|
Navigation: Database > MS SQL Server > Manual Installation > Demo Database |
|
When starting with a new database, the migration utility is not required. After installing SQL Server Express and SQL Server Management Studio, complete the following steps to begin using the demo database (or blank database):
1. Download the SQL Database backup from the drivers and utilities download page at http://www.amigopos.com. The database is available with or without demo data. The database without demo data has no menus and only one employee with manager permissions and login id #2. Unzip the database backup to a folder on the root drive, i.e. C:\SQL Backups.
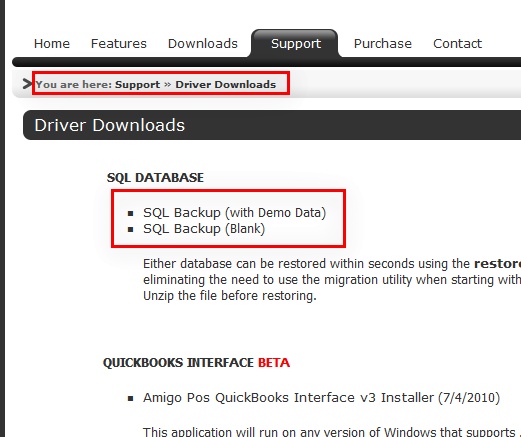
Driver Downloads
2. Open SQL Management Studio and connect to the database server. Right-click on Databases and select Restore Database...
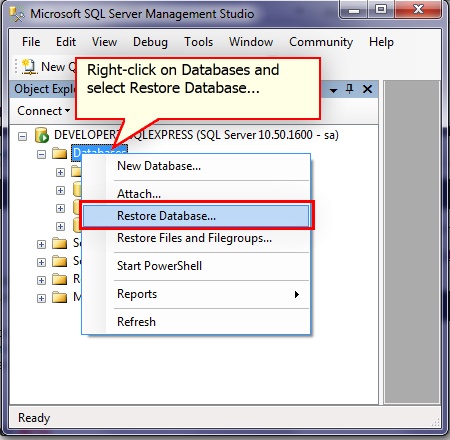
SQL Server Management Studio
3. In the Restore Database dialog, select From device and click the Browse button
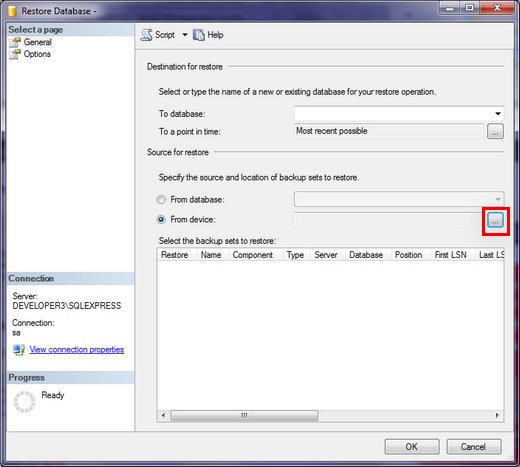
Restore Database Dialog
4. In the Specify Backup dialog, click Add.
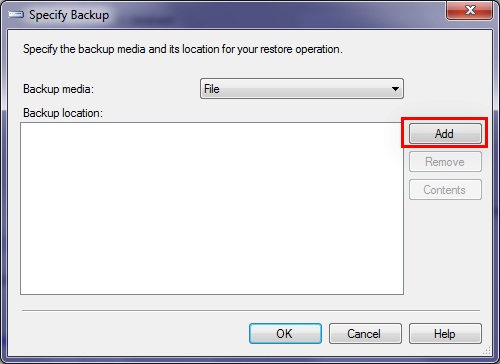
Specify Backup
5. Browse to the the file that was unzipped in Step 1. Select the file, verify that the correct file name appears in the File name box and click OK. Click OK in the Specify Backup dialog to continue.
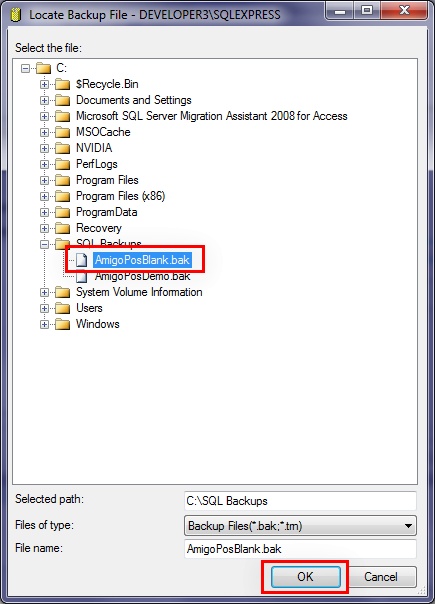
Select Backup File
6. Enter a name for the new database and check the box under the Restore Column. Click OK to restore the backup.
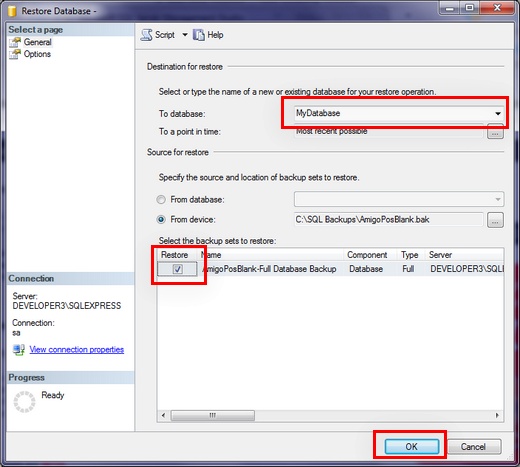
Restore Database Dialog
7. The database is now ready to use. Open the database configuration utility and enter the settings for the new database as described here.
Page url: http://www.amigopos.com/help/html/index.html?demo_sql_database_restore.htm