Navigation: Back Office >
Summary Lists


|
Navigation: Back Office > Summary Lists |
|
Data shown in the main back office summary is displayed in searchable lists. Currently, the following data is available in the back office Summary tab:
| • | Orders |
| • | Transactions |
| • | Credit Card Transactions |
| • | Deliveries |
| • | Bar Tabs |
| • | Drawer Reset Log |
| • | Cash Drops |
| • | Server Deposits |
| • | Driver Deposits |
| • | Cash Payouts |
| • | No Sale Log |
| • | End Of Day Log |

Back Office Summary Group
Data Filters
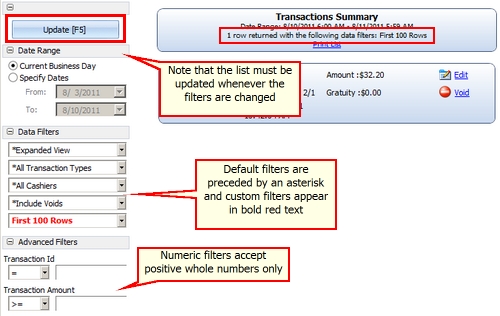
Each list can be filtered by date range and other variables based on the underlying data source. For example, the transactions list can be filtered by transaction type, cashier, include/exclude voids, transaction id and transaction amount. In addition, the maximum number of rows to return can be set. On slower machines, select Compact View for faster loading. The list must be refreshed whenever a filter is changed, either by pressing the Update button or clicking the F5 key on the keyboard. Note that the third line of the page header displays the number of rows and the data filters. Default settings appear with an asterisk; custom settings are displayed in bold red text.
Default filters shared by all lists include:
| • | Date Range: Set to Current Business Day to include all records within the 24-hour period since the business day start. Specify dates to selected a different date range. In both cases, the date range is displayed on the second line of the page header. |
| • | Expanded View/Compact View: Set to Compact View to return only the first line of each row. This setting is useful for slower machines or lists with a large number of records. |
| • | Maximum Rows: Select the maximum number of records to return |
Data Filters
User Settings
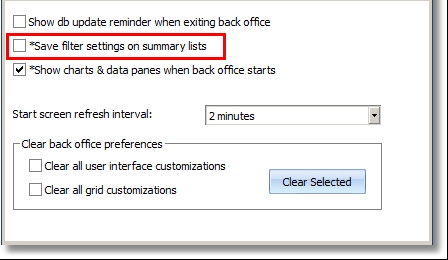
The position of each data filter list is saved and reloaded each time the list is opened. The settings are stored per-user for each summary screen type on the local workstation. This feature can be disabled in Options > Preferences by unchecking the box.
User Preferences
Printing
The list can be printed by pressing the Print List link in the page header. A full size printer is required, and the user is given the opportunity to select the printer before sending the print job. In addition, the number of pages (or page numbers) can be selected.

Page Header Print List Link
List Item Links
Some lists include the ability to manipulate data by clicking a link in the list item. For example, the orders list includes links to:
| • | View Order Details |
| • | Edit the order |
| • | Void the order |

Orders List Links
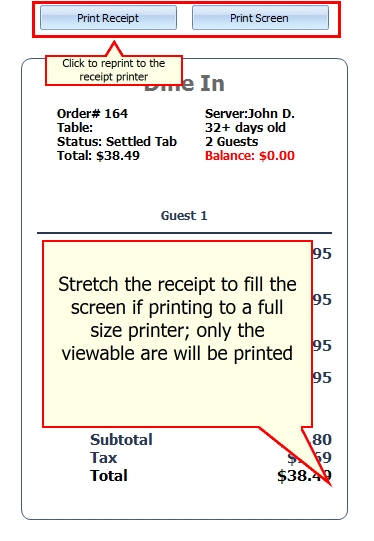
The order details screen displays the mockup of the customer receipt, which can be printed to a full size printer.
View Order Details
Edit Details
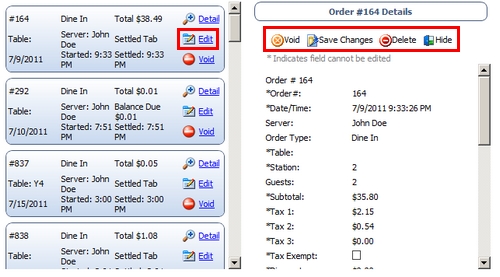
The order details can be edited on a grid by clicking the Edit link. Changes to the grid are saved when either the Enter key is pressed or the Save Changes button is clicked. Note that fields marked with an asterisk are read-only and cannot be edited. In addition, the order can be voided or deleted on the details grid. Click the Hide button to expand the orders list to full size and hide the editor.
Edit Order Details
Page url: http://www.amigopos.com/help/html/index.html?summary_lists.htm