Navigation: Peripherals > Receipt Printer > Installation >
Receipt Printer Installation (Windows XP)


|
Navigation: Peripherals > Receipt Printer > Installation > Receipt Printer Installation (Windows XP) |
|
Receipt Printer Installation
One receipt printer can be installed on each pos station running Amigo Pos. Adding a receipt printer correctly is vital to a successful installation. The following instructions describe the process of manually setting up a typical receipt printer with a parallel or serial interface. Manual installation using the MS Windows XP Add Printer Wizard. The following instructions do not apply to most USB receipt printers, which require manufacturer device drivers. Refer to the Star USB Printer Installation topic or the Epson USB Printer Installation topic for directions to install a USB receipt printer.
| 1. | Click Start | Printers and Faxes. The Windows Printers and Faxes folder will appear. |
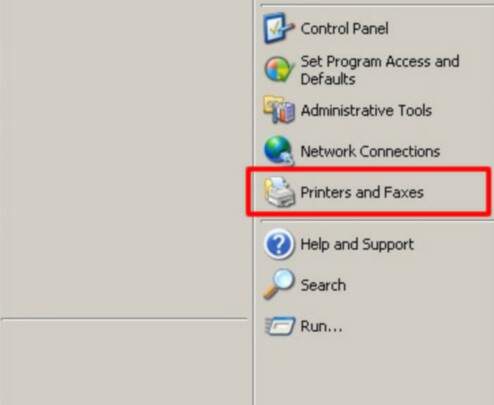
The Windows XP Printers and Faxes folder can be accessed from the start menu.
| 2. | Click "Add A Printer" on the explorer bar. The printer wizard will appear. |
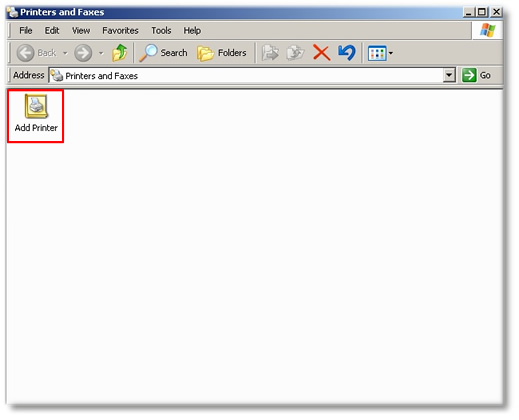
Click Add a printer to start the Add Printer Wizard
| 3. | Click Next to continue. |
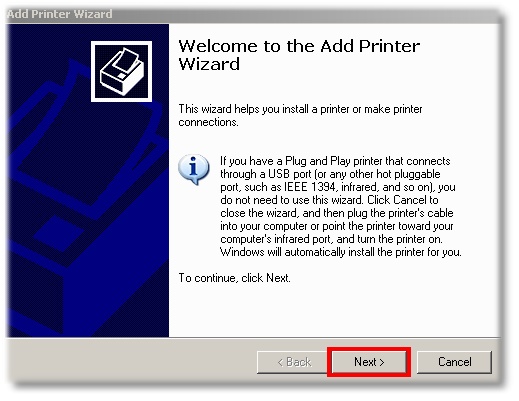
The MS Windows XP Add Printer Wizard
| 4. | Select "Local Printer Attached To The Computer". Do not check the box next to Automatically detect and install my Plug and Play printer. |

Local Printer
| 5. | Select the port to which the printer is connected and click Next to continue. |

Printer Port
| 6. | Select the Generic/Text Only printer driver and click Next. |
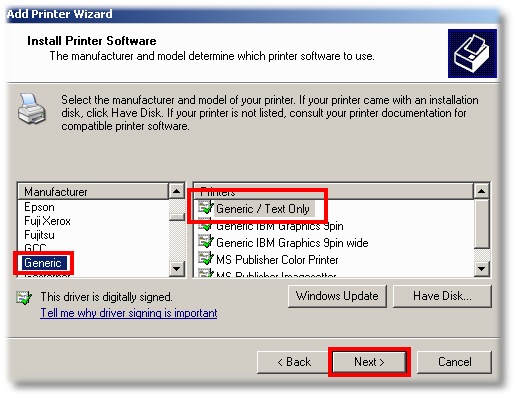
Generic / Text Only Driver
| 7. | Enter a friendly name for the receipt printer and click Next to continue. |

Printer Name
| 8. | If sharing this printer on the network, specify the share name. Receipt printers are generally not shared unless located at a bar pos station, where the receipt printer may also function as a prep printer. Click Next to continue. |
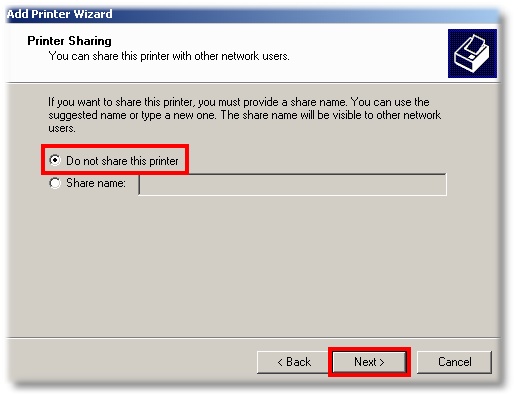
Printer Sharing
| 9. | Click Finish to complete the Add Printer Wizard. There may be a short delay while the drivers are copied to the system folders. |
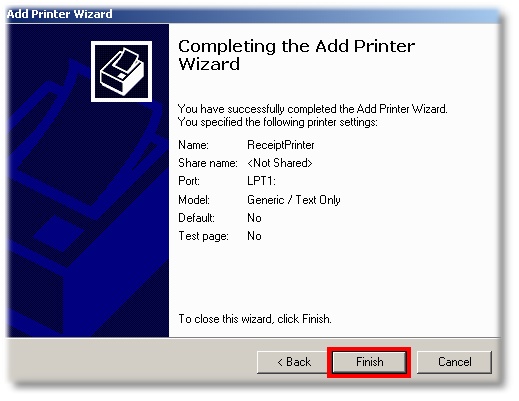
Completing the Add Printer Wizard
| 10. | In Amigo Pos, navigate to Back Office > Configuration > Peripherals > and select the printer name from the drop-down list. Select the appropriate printer type and click the Test Receipt* button to confirm that the printer is installed correctly. |

Back Office > Configuration > Peripherals
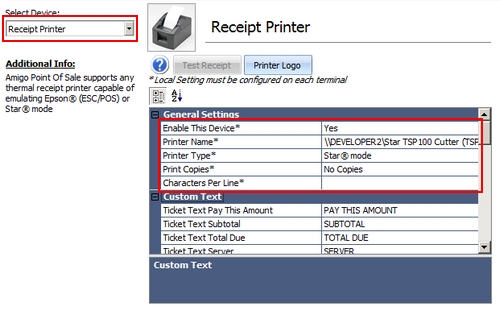
Receipt Printer Configuration
*The Test Receipt button is enabled only when back office is started from the Amigo Pos main screen (not the desktop shortcut).
Page url: http://www.amigopos.com/help/html/index.html?receipt_printer_installation.htm