Navigation: Peripherals > Receipt Printer > Installation >
Star USB printer Installation


|
Navigation: Peripherals > Receipt Printer > Installation > Star USB printer Installation |
|
Installing a Star TSP100 USB interface printer requires the driver installation package supplied on CD with new Star printers or available for download at http://www.starmicronics.com. Do not connect the printer until after the drivers have been installed. The following images are taken from driver version 3.0a.
Note: When using a serial, ethernet or parallel port printer, the Star drivers are not required. Install the printer normally using the Windows Add Printer wizard with generic/text only drivers.
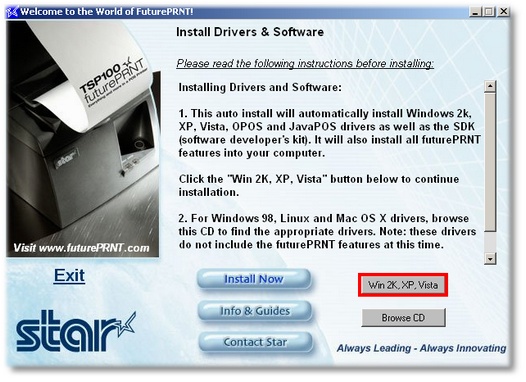
1. Insert the CD that came with the printer or download and unzip the driver installation package from http://www.starmicronics.com. Allow the disk to auto run or double-click on autorun.exe. Click Install Now and review the License Agreement. Click I Accept if you have read and agree with the License Agreement.
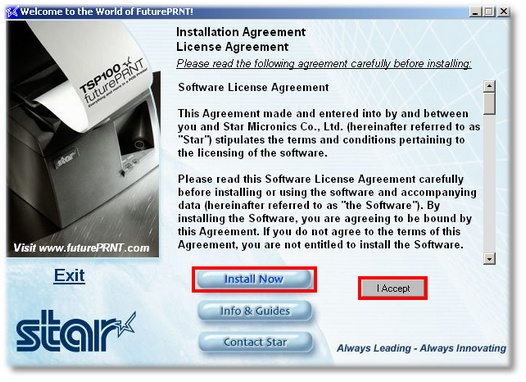
Accept the License Agreement
2. The application will detect your operating system. Click Win2K, XP, Vista to start the installer.
|
Select the Operating System |
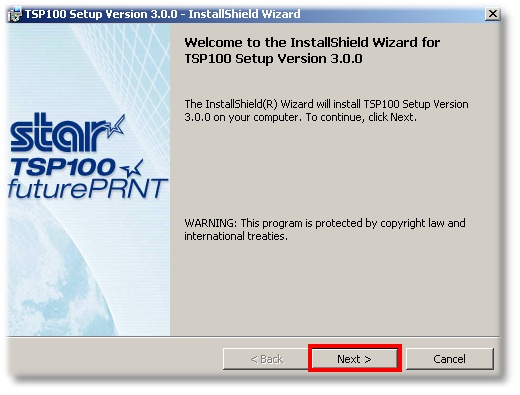
3. Click Next on the welcome screen.
|
Setup Welcome Dialog |
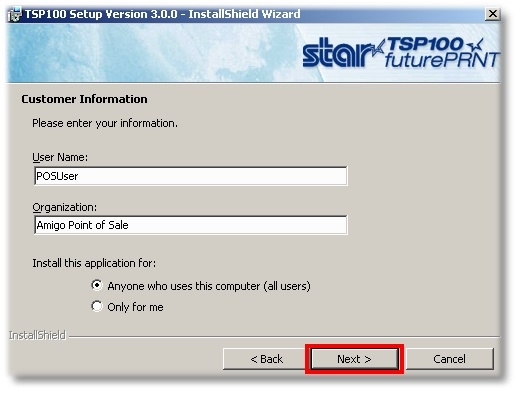
4. Review the customer information and the scope of the installation. Click Next.
|
Customer Information |
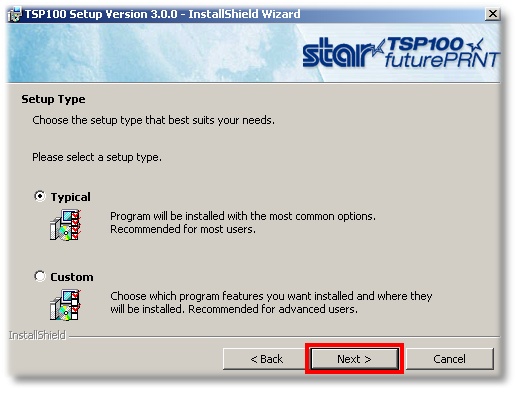
5. Select Typical setup type and click Next.
|
Specify the Setup Type |
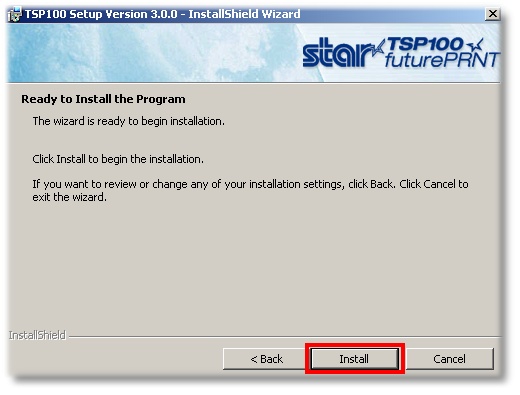
6. Click Install to begin the installation.
|
Begin Installation |
7. The installation will take approximately 2 minutes. Do not interrupt the process or use other programs while the installer is running.
|
Installation Progress |
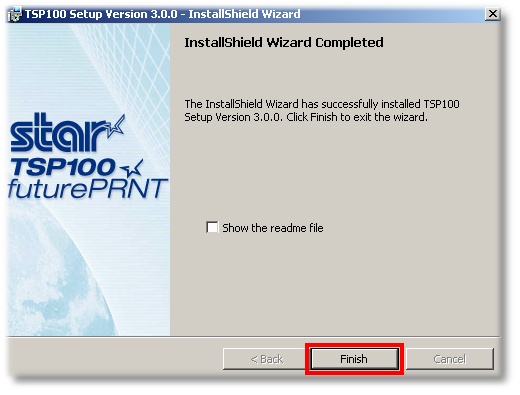
8. Click Finish to exit the installer.
|
Installation Results |
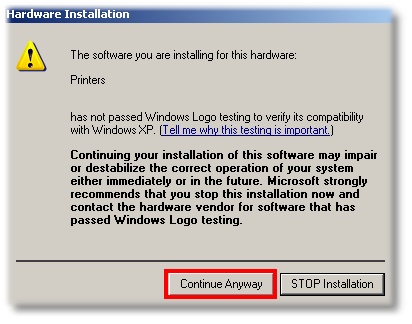
9. Connect the printer to a free USB port on the POS station and power on the printer. The Windows Found New Hardware prompt will appear on the taskbar near the clock, followed by a Windows Logo warning, which indicates that the manufacturer has no submitted the driver for certification to verify it's compatibility with Windows. Click the Tell me why this is important link for additional information. If you agree to ignore this warning, click Continue Anyway. After a few moments, the new printer is automatically added to the Printers and Faxes folder.
|
Windows Driver Installation Confirmation |
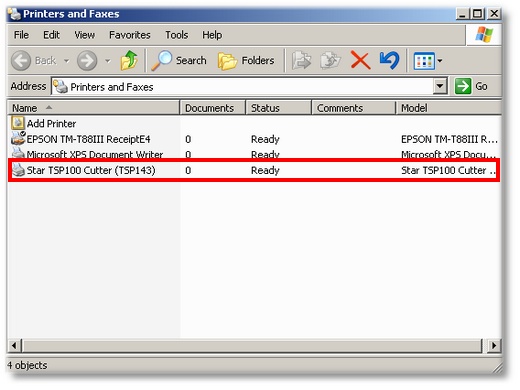
10. Open the Windows Printers and Faxes Folder to confirm that the new printer has been installed and is on-line.
|
Windows Printers and Faxes Folder |
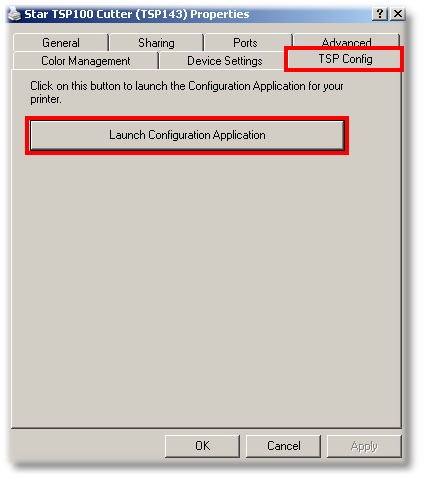
11. Amigo Pos can send commands to the Star TSP100 in either the Star or ESC/POS (Epson) command set. There are slight differences in the receipt output. To use the ESC/POS command set with the TSP100, open the Windows Printers and Faxes folder and right-click on the Star TSP100 Cutter (TSP143). Click Properties and select the TSP Config tab. Click Launch Configuration Application.
|
Printer Properties Dialog |
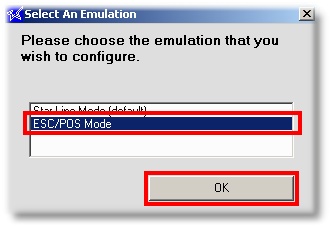
12. Select ESC/POS Mode and click OK.
|
Select ESC/POS Emulation |
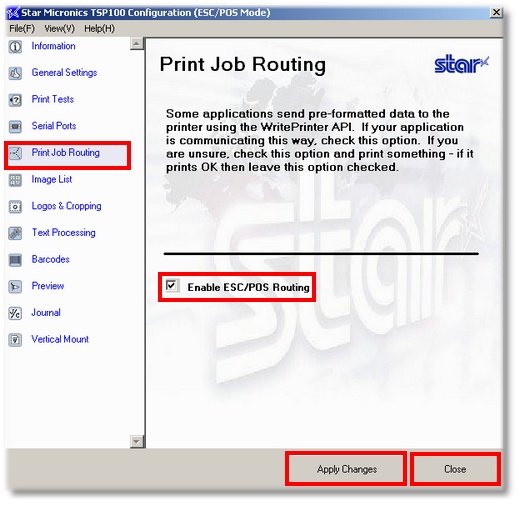
13. Click Print Job Routing and check the box next to Enable ESC/POS Routing. Click Apply Changes and Close.
|
Print Job Routing |
Page url: http://www.amigopos.com/help/html/index.html?star_usb_printer_installation.htm