Navigation: Peripherals > Receipt Printer >
Printer Bitmap Logo


|
Navigation: Peripherals > Receipt Printer > Printer Bitmap Logo |
|
Uploading A Logo To An Epson-Compatible Thermal Receipt Printer
Thermal printer users may wish to print a custom logo on the customer receipt. This is a simple process that requires minimum initial setup. First, prepare a suitable logo image. A sample logo named is included in the program installation directory. The dimensions of this image are 500px wide by 172px high, but you may resize the image to suite your needs. Using your favorite image editing program, create a black and white logo and export it as an 8-bit black and white bitmap image (with the .bmp extension).
A sample printer logo
If you have not already done so, download and install the Epson advanced printer driver. This driver can be downloaded from http://www.epsonexpert.com/ . Create a new order in Amigo Pos to ensure that your printer is installed correctly. Consult the help manual for additional help in setting up your receipt printer. Next, download and install the Epson TM Flash Logo Utility from http://www.epsonexpert.com/. Make a note of the installation directory, as the installer does not create a desktop or start menu shortcut (Star and Dell thermal receipt printers include a logo upload utility on the driver disk included with the printer).
Follow the steps below to enable your printer to print your logo on the receipt:
| 1. | Locate the Epson TM Flash Logo Utility's installation directory and double-click on TMFLogo.exe |
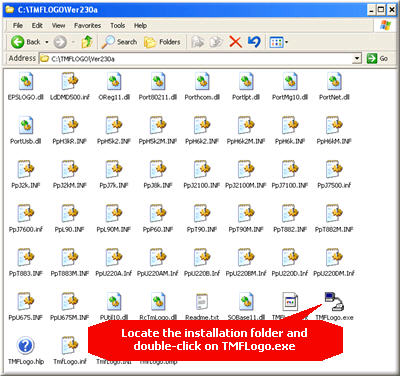
Locate the installation directory
| 2. | Click the Setup tab and select your printer from the drop-down list under Device Name. Next, select the interface port next to Port Name. Click the Apply button followed by the Comm. Test button to ensure that your printer settings are correct. |

Setting the device properties
| 3. | Next, choose the Bitmap Selection tab and click the Open File... button to locate your logo file. Navigate to the directory that contains the logo file and click the Open button. |
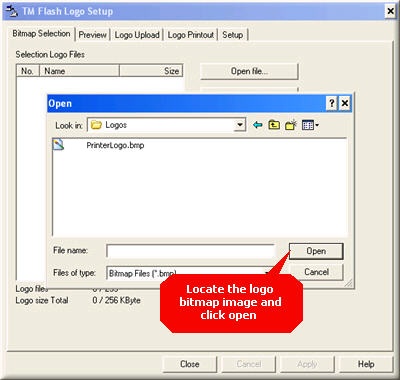
Select the image file
| 4. | Now choose the Preview tab to ensure that your logo will appear correctly on the customer receipt. If you are using a logo with the dimensions of the logo sample provided with Amigo Pos, you should select Double Height/Width under Quality to stretch the logo horizontally while keep the correct image proportions. Ensure that the image fills the Preview box. If not, your logo will most likely appear on the left side of the receipt. |

Preview the logo image
| 5. | The logo can now be uploaded to the printer. Select the Logo Upload tab and click the Device button. The upload will begin automatically. Do not interrupt the process or an error will result. |

Send the logo to the printer
| 6. | The utility will confirm that the logo has been uploaded successfully. When your logo is finished uploading, your printer may emit a slight click followed by a single flash of the red Error LED on the printer's control panel. This is normal and does not indicate a problem. Click the OK button and followed by the Close button to shut down the program. Cycle your printer off and then on again. Open Amigo Pos and create a customer receipt to ensure that the logo is uploaded correctly. |

Reset the printer
Page url: http://www.amigopos.com/help/html/index.html?printer_bitmap_logo.htm